CentOS创建KVM虚拟机
本文最后更新于:April 5, 2020 am
使用qemu-kvm在CentOS8上通过GUI创建虚拟机。
1、安装系统组件
首先我们需要安装epel源和相应的虚拟机工具
1 | |
一些主要组件的功能介绍如下:
-
virt-installDescription : Package includes several command line utilities, including virt-install
: (build and install new VMs) and virt-clone (clone an existing virtual
: machine). -
virt-whoDescription : Agent that collects information about virtual guests present in the system and
: report them to the subscription manager. -
virt-topDescription : virt-top is a ‘top(1)’-like utility for showing stats of virtualized
: domains. Many keys and command line options are the same as for
: ordinary ‘top’.
:
: It uses libvirt so it is capable of showing stats across a variety of
: different virtualization systems. -
virt-viewerDescription : Virtual Machine Viewer provides a graphical console client for connecting
: to virtual machines. It uses the GTK-VNC or SPICE-GTK widgets to provide
: the display, and libvirt for looking up VNC/SPICE server details. -
virt-managerDescription : Virtual Machine Manager provides a graphical tool for administering virtual
: machines for KVM, Xen, and LXC. Start, stop, add or remove virtual devices,
: connect to a graphical or serial console, and see resource usage statistics
: for existing VMs on local or remote machines. Uses libvirt as the backend
: management API. -
libvirtDescription : Libvirt is a C toolkit to interact with the virtualization capabilities
: of recent versions of Linux (and other OSes). The main package includes
: the libvirtd server exporting the virtualization support. -
qemu-kvmDescription : qemu-kvm is an open source virtualizer that provides hardware
: emulation for the KVM hypervisor. qemu-kvm acts as a virtual
: machine monitor together with the KVM kernel modules, and emulates the
: hardware for a full system such as a PC and its associated peripherals.
2、创建虚拟机
2.1 配置虚拟机存储目录
这里我们直接开启宿主机Linux系统上面的GUI模式并且使用xrdp远程到桌面,然后使用virt-manager来进行GUI模式的创建虚拟机。
这里需要注意的是因为我们使用的是ISO镜像文件来进行虚拟机系统的安装,因此必须需要一个GUI界面来进行最开始的系统安装,等待系统安装完成之后,我们可以直接使用命令行操作来克隆虚拟机,就不用每次都打开GUI模式安装系统这么麻烦了。
接着我们创建一个目录专门用来存放虚拟机相关的镜像和文件,同时我们还需要注意权限的问题:
1 | |
接着我们把相应的系统安装镜像复制进去(对应的系统安装镜像文件均可直接在对应的官网下载),然后打开Virtual Machine Manager(以下简称VMM)来创建虚拟机

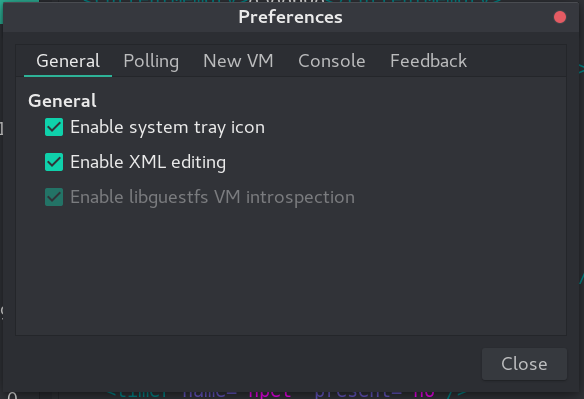
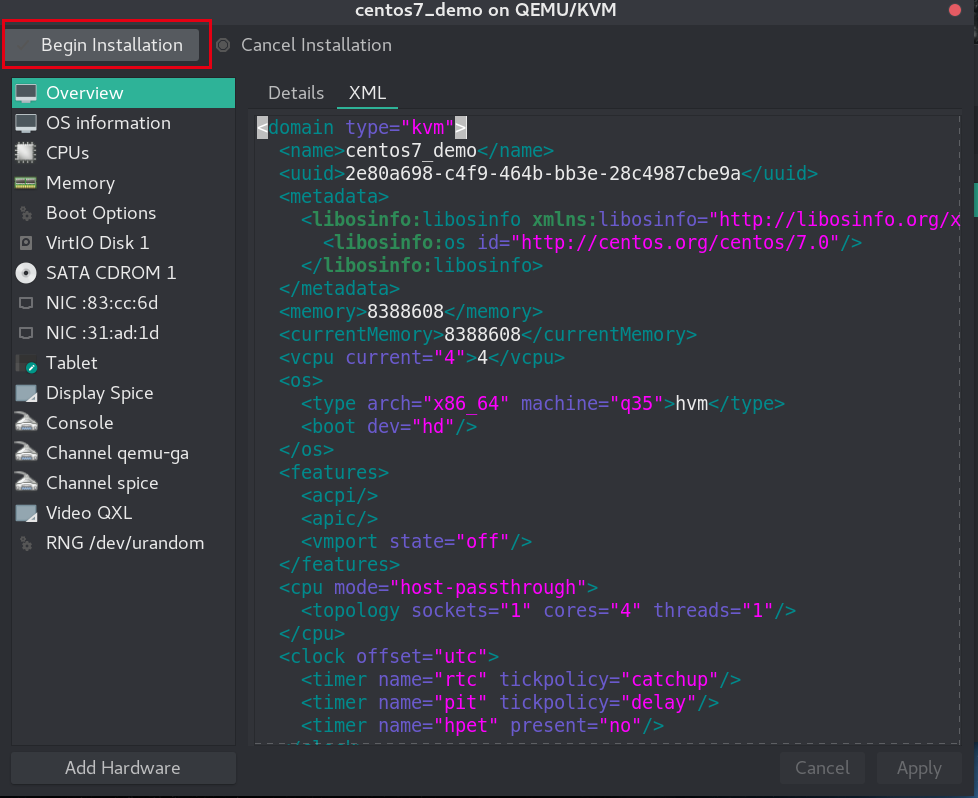
首先我们在Edit→Preferences里面开启XML文件编辑功能,XML模式可以最大程度的控制虚拟机的所有配置,一些特殊的配置或者组件操作无法通过VMM的GUI界面完成的我们可以直接编辑对应的XML文件块来实现。
2.2 创建虚拟机
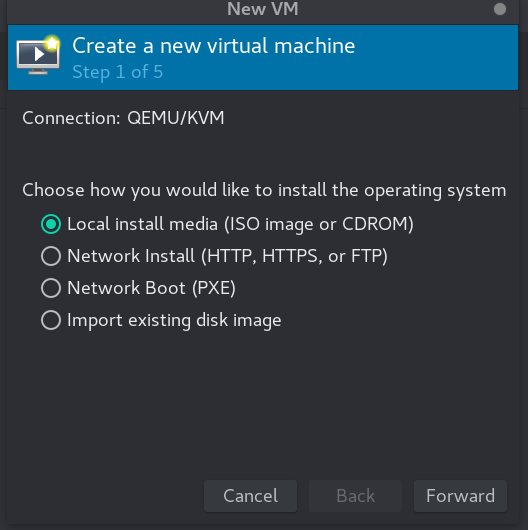
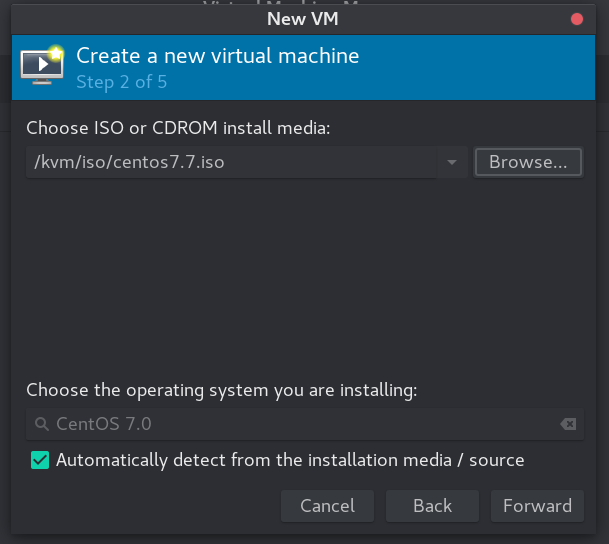
直接点击加号或者上面的File→New Virtual Machine然后选择使用本地媒体创建虚拟机(这里我们使用刚刚复制进去的ISO镜像文件)

接着我们可以看到有四种创建虚拟机的方式:
- 从本地的媒体资源安装(iso文件或者CD光盘)
- 通过网络协议获取安装的镜像文件然后进行安装
- 通过PXE进行安装
- 导入已有的虚拟机硬盘镜像文件
我们选择第一种方式进行新建虚拟机操作。
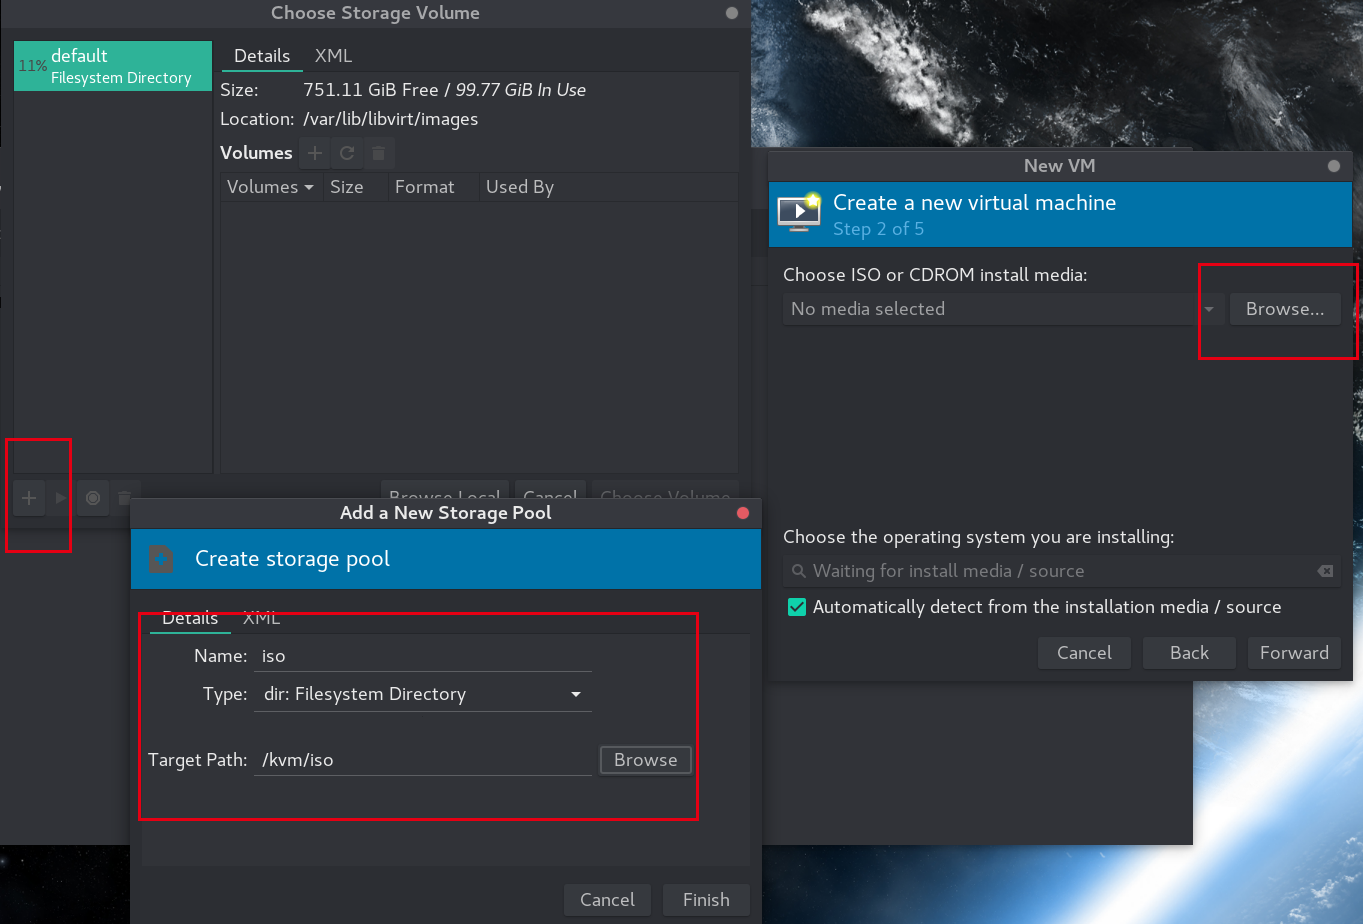
由于是第一次创建虚拟机,我们需要先在VMM中添加一个池(pool),把先前创建的存放iso镜像文件的目录作为一个池添加到VMM中。
添加完成之后我们就可以看到里面的镜像文件,这里我们选择CentOS7的版本进行安装。
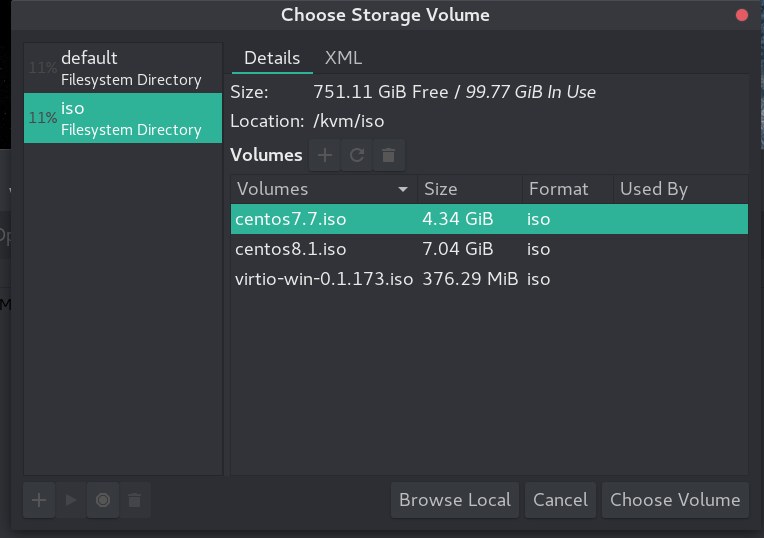
选择镜像之后VMM会自动检测镜像文件内包含的操作系统。
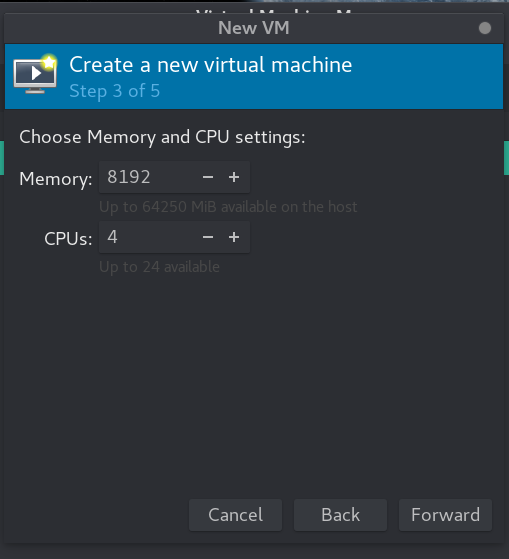
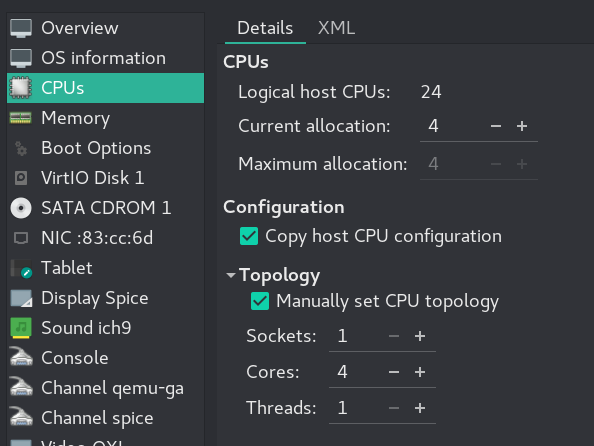
接下来是设定CPU和内存,注意这里的内存单位是MB,而CPU的单位是个,即并不是我们常说的CPU核心数量或者是超线程的线程数量,而是虚拟设定的多少个CPU,这里选择4即为4个CPU而不是一个4核CPU,这个选项我们后面需要再进行修改。
接下来便是进行虚拟机的硬盘参数设置,我们这里选择手动创建一个硬盘。

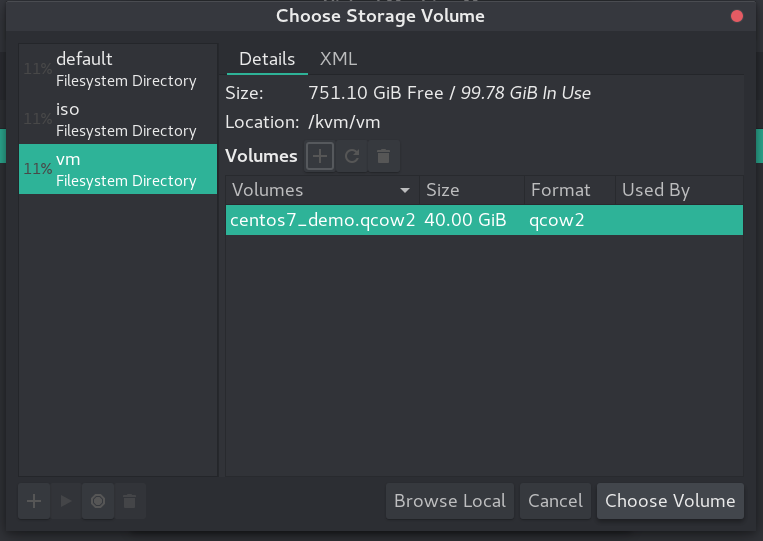
和之前一样我们再创建一个池专门用来存放虚拟机的系统镜像文件。

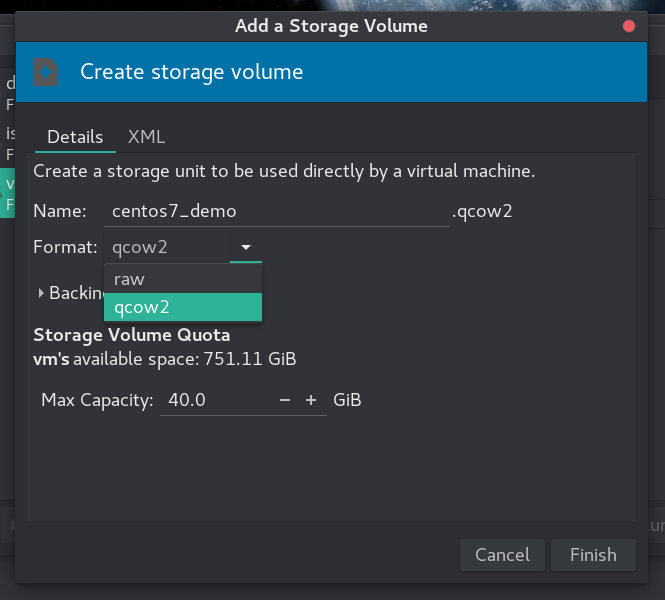
接着在对应的池中新建一个qcow2磁盘文件。

这里我们可以看到硬盘的格式主要有raw和qcow2两种。qcow2 镜像格式是 QEMU 模拟器支持的一种磁盘镜像。它也是可以用一个文件的形式来表示一块固定大小的块设备磁盘。与普通的 raw 格式的镜像相比,有以下特性:
- 更小的空间占用,即使文件系统不支持空洞(holes);
- 支持写时拷贝(COW, copy-on-write),镜像文件只反映底层磁盘的变化;
- 支持快照(snapshot),镜像文件能够包含多个快照的历史;
- 可选择基于 zlib 的压缩方式
- 可以选择 AES 加密
qcow2最大的特点就是可以节省硬盘空间,只有在虚拟机实际占用了磁盘空间时,其文件才会增长。比如这里我们创建了一个40G的硬盘镜像文件,但是实际占用并没有40G,只有在虚拟机实际使用了硬盘空间之后,qcow2格式的镜像文件才会增大。
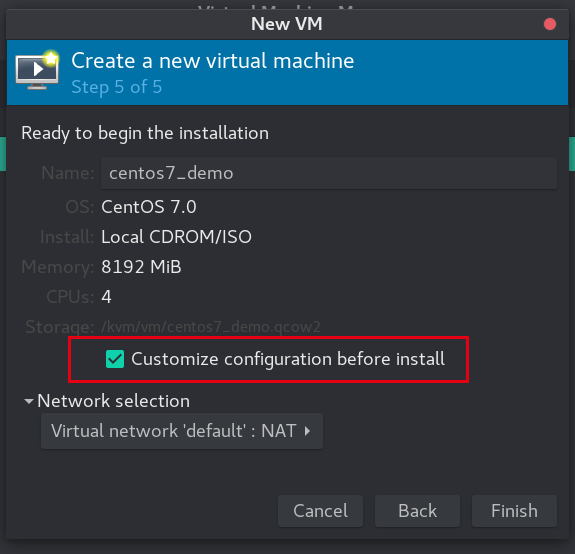
最后需要设置的就是虚拟机的网卡,这里我们要勾选Customize configuration before install,在系统开始安装之前进行一些参数的设置。
2.3 配置虚拟机其他参数
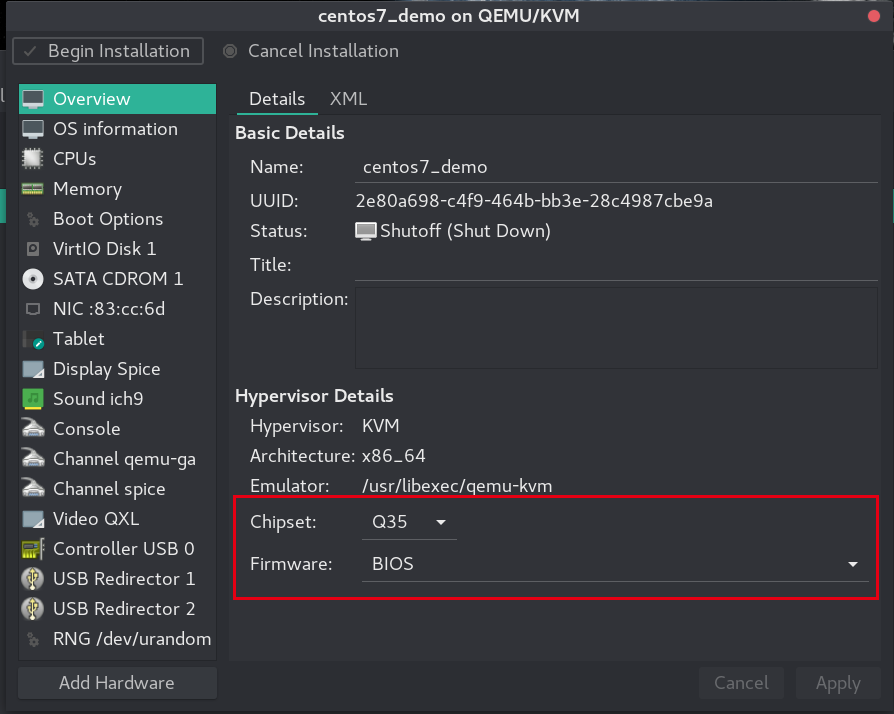
首先我们看到Overview中的Chipset和Firmware两个参数,它们分别相当于物理机电脑主板的芯片组和固件模式(BIOS或UEFI),如果有新版本的需求(如虚拟机KVM直通GPU)可以选择UEFI(OVMF)来进行启动,需要注意VMM中的快照(snapshot)功能不支持UEFI(OVMF)固件的虚拟机,因此这里我们选择默认的Q35和BIOS即可。
接下来我们需要对前面设定的CPU参数进行更改。这里我们编辑对应的XML文件将CPU模式修改为host-passthrough以便将CPU的全部特性传递到虚拟机中,同时修改CPU个数为1,核心数为4,每个核心的线程数为1。
1 | |
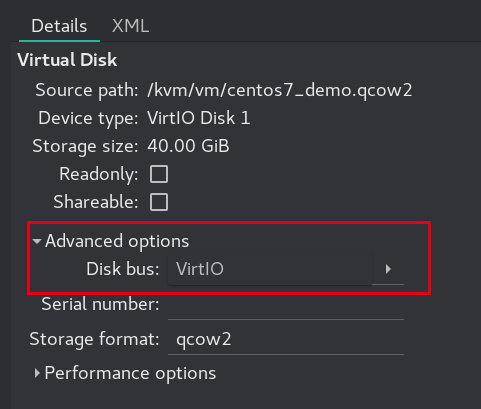
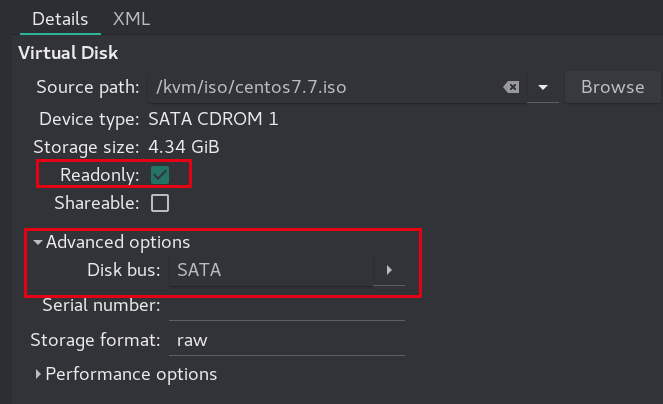
设定安装系统的ISO为只读,保证ISO文件不会被修改,同时设置数据总线方式为SATA保证最好的兼容性。
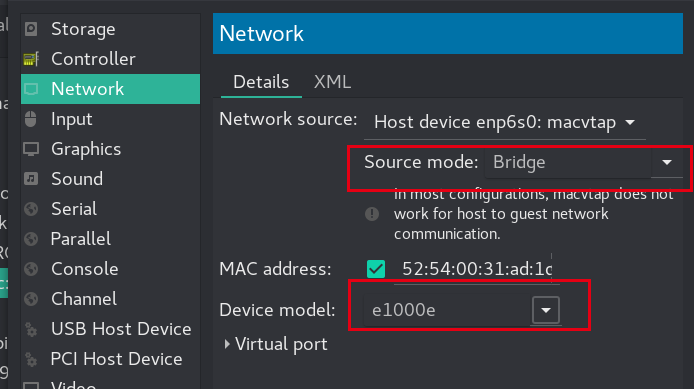
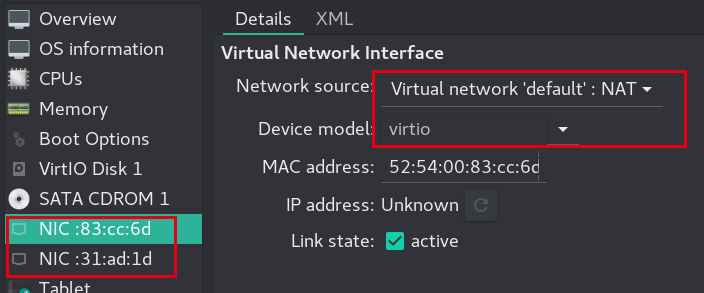
配置两个网卡,分别为桥接宿主机的网卡和NAT模式,其中桥接网卡使用e1000e型号保证最好的兼容性,NAT模式的网卡使用VirtIO型号可以达到最大100G的传输速度。
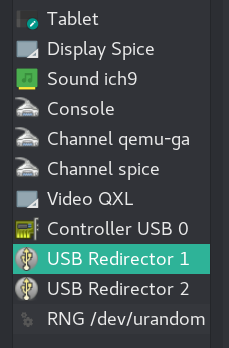
其他还会默认添加一些常用的组件,我们根据自己的需求进行修改,这里我只保留了常用的USB重定向设备,声卡、网卡、串行总线等基本设备,如果不清楚具体需求,建议保留。
最后整个完整的xml文件如下:
1 | |
2.4开始安装
接下来的安装就和正常的物理机安装操作系统一样,这里我们就不再赘述了,由于是CentOS的虚拟机,为了节约系统资源,我选择了最小化安装(Minimal Install)、关闭了KDUMP功能,并且使用LVM来设定分区以便后期扩容

最后可以通过virsh命令来查看虚拟机的状态
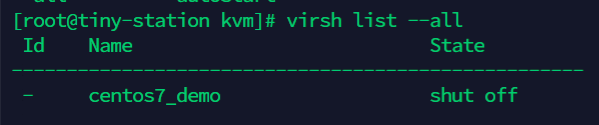
如果需要开启虚拟机只需要使用virsh start 虚拟机名即可。